Creating an Evaluation
This guide walks you through creating a new evaluation to test your AI assistant's behavior.
Step 1: Navigate to Evaluations
- Go to the Evaluations section in the sidebar
- Click the Create Evaluation button

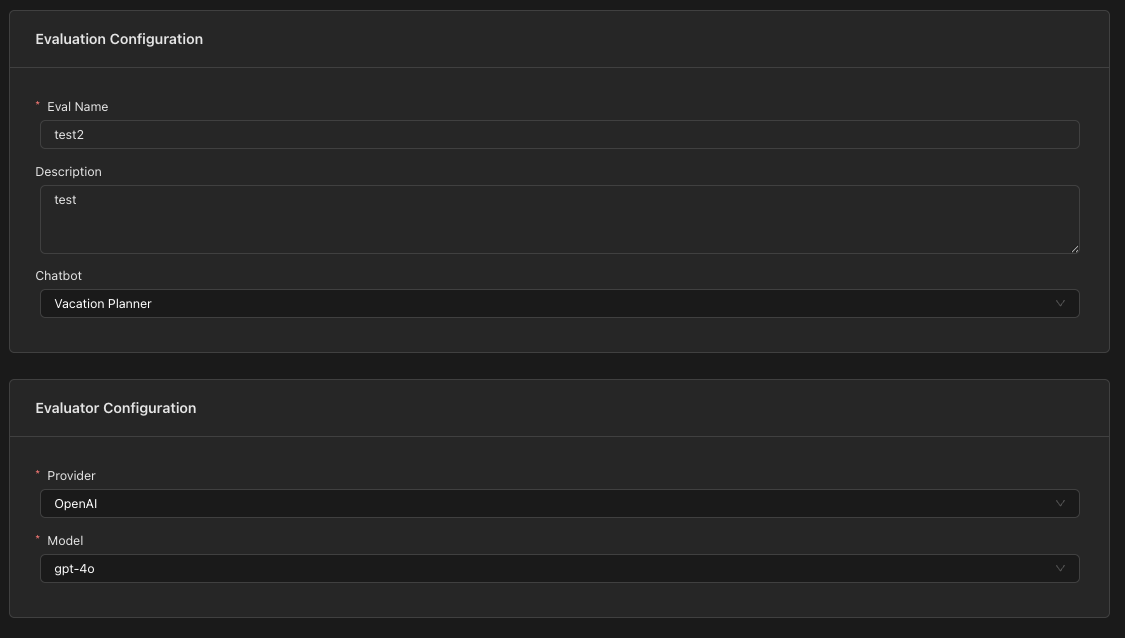
Step 2: Configure Evaluation Settings
Fill in the basic evaluation details:
Evaluation Name
Give your evaluation a descriptive name that clearly identifies what scenario is being tested.
Example: "Appointment Booking Happy Path" or "Refund Request Handling"
Description (Optional)
Add additional context about what this evaluation tests and why it's important.
Select Chatbot
Choose the chatbot you want to test. This will:
- Load the system prompt automatically
- Make the chatbot's enabled tools available for TOOL_RESPONSE turns
Select Evaluator Model
Choose the LLM that will act as the judge for "LLM-as-a-Judge" evaluations:
- Provider: Select your LLM provider (e.g., OpenAI, Anthropic)
- Model: Select the specific model to use as the evaluator
Step 3: Build Conversation Turns
The Turn Builder is where you define the conversation flow and expected behaviors.
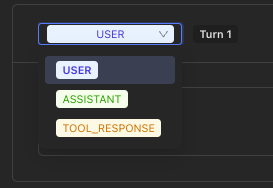
Adding Turns
Click the appropriate button to add turns:
- Add User - Add a USER message
- Add Assistant - Add an ASSISTANT turn (mock or evaluation)
- Add Tool Response - Add a TOOL_RESPONSE turn
User Turns
User turns simulate what a user might say to your assistant.
- Click Add User
- Enter the user message in the text area
Example: "I'd like to book an appointment for tomorrow at 2pm"

Assistant Turns
Assistant turns can operate in two modes: Mock or Evaluation.
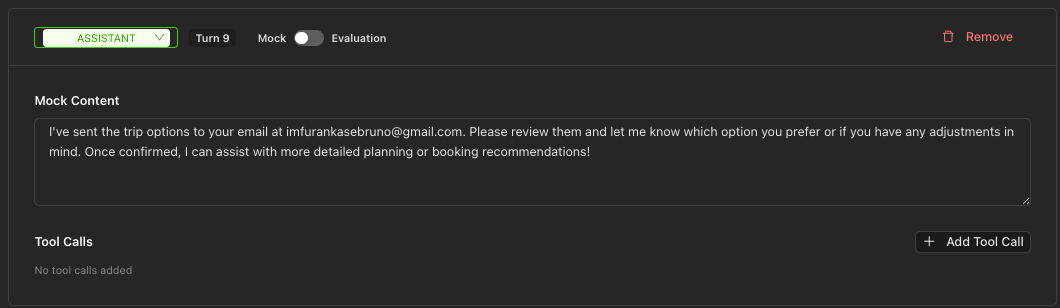
Mock Mode
Use Mock mode when you want to provide a fixed assistant response. This is useful for:
- Testing how the system handles specific assistant outputs
- Providing context for downstream turns
- Simulating tool calls
- Add an Assistant turn (defaults to Mock mode)
- Enter the mock response content
- Optionally add Tool Calls that the assistant "would have made"
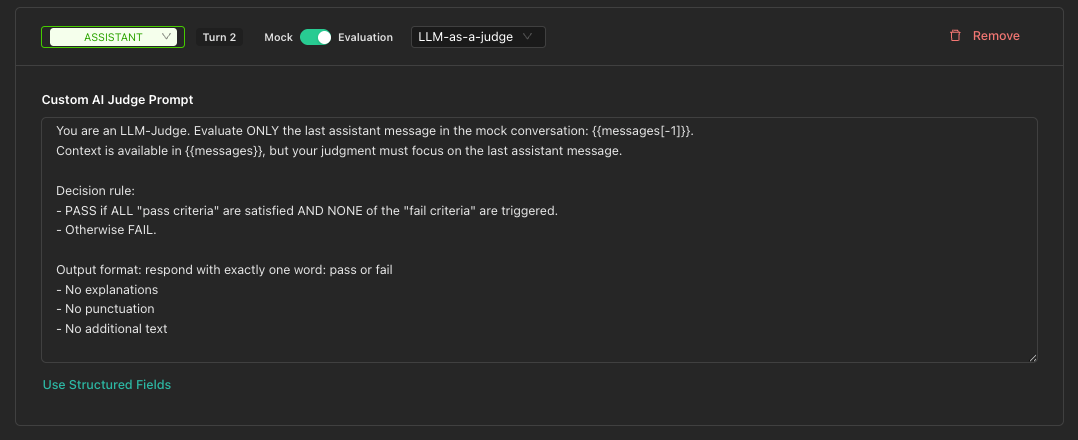
Evaluation Mode
Use Evaluation mode to test the actual LLM response against specified criteria.
- Toggle from Mock to Evaluation mode using the switch
- Select an evaluation approach:
- LLM-as-a-Judge
- Exact
- Regex
- Configure the criteria based on your chosen approach
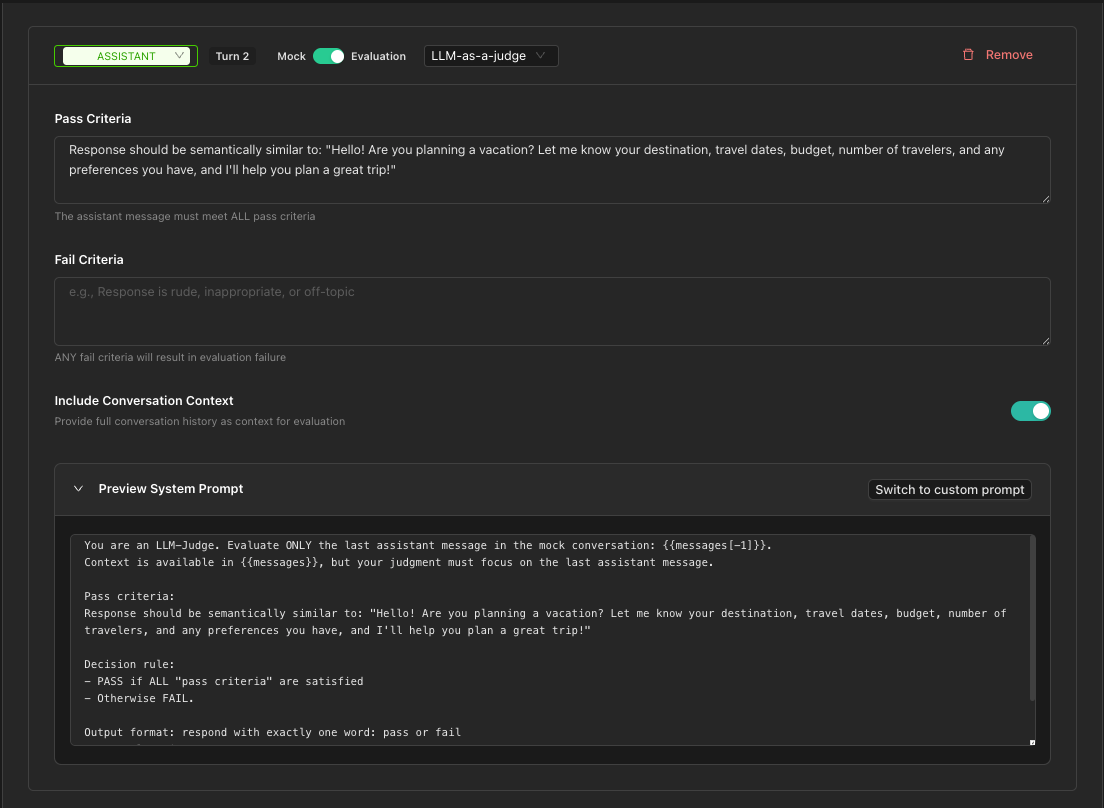
LLM-as-a-Judge Approach
This approach uses an LLM to evaluate whether the response meets your criteria.
Using Structured Fields (Recommended)
Define clear pass/fail criteria:
-
Pass Criteria: Conditions that must ALL be met for PASS
- Example: "Response is polite and helpful, mentions available time slots"
-
Fail Criteria: Conditions that trigger FAIL if ANY are met
- Example: "Response is rude, off-topic, or provides incorrect information"
-
Include Conversation Context: Toggle whether the judge can see the full conversation (default: on)
Using Custom Prompt
For more control, click Use Custom Prompt to write a completely custom judge prompt.
Exact Match Approach
Use this for responses that should match exactly (case-insensitive).
- Enter the Expected Content
- The response must match this text exactly to pass
Example: For a yes/no question where you expect "yes"
Regex Approach
Use pattern matching for flexible validation.
- Enter a Regex Pattern (JavaScript style)
- Use
/pattern/flagsformat or just the pattern
Examples:
/thank(s)?/i- Matches "thank" or "thanks" (case-insensitive)\d{3}-\d{4}- Matches a phone number format
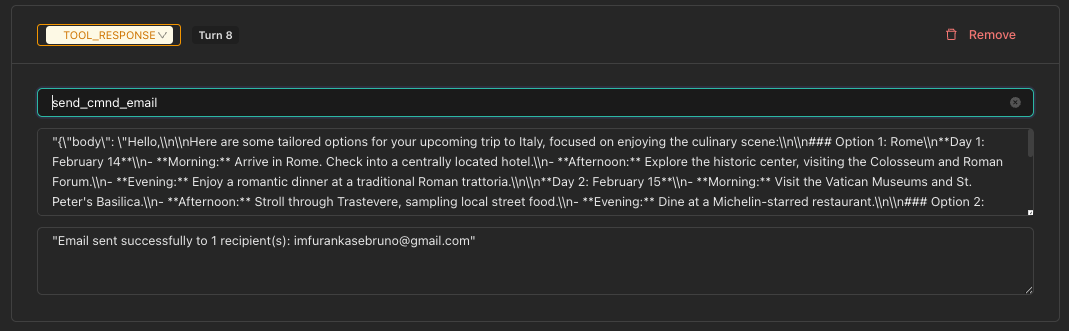
Tool Response Turns
TOOL_RESPONSE turns represent tool execution results in the conversation.
- Click Add Tool Response
- Select a Tool from the dropdown (populated from your chatbot's enabled tools)
- The Tool Arguments are auto-populated with defaults
- Enter the Tool Response Content (the result the tool returns)
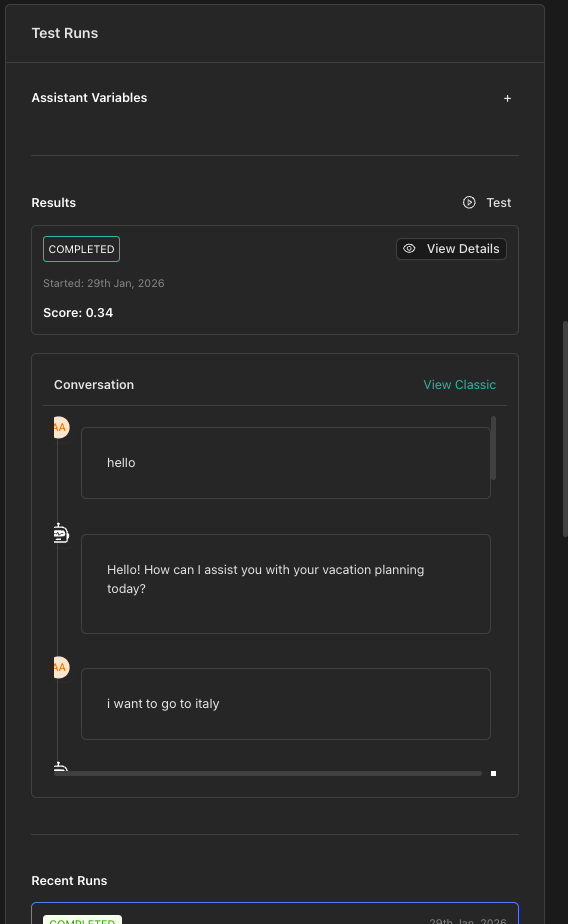
Step 4: Test Before Saving
Before creating your evaluation, you can run a quick test from the Test Panel on the right:
- Click Run Test in the right sidebar
- The test runs in the background — you can continue editing
- View results in the panel when complete (past 5 runs shown)
- Click View Details to see full results for any run
Assistant Variables
If your chatbot uses variables, configure them in the Assistant Variables section in the sidebar.
Step 5: Save the Evaluation
Once satisfied with your configuration:
- Click Create Evaluation (or Update Evaluation in edit mode)
- You'll return to the Evaluations list
Tips for Effective Evaluations
Be specific in your pass/fail criteria. Vague criteria like "good response" make it hard for the judge to evaluate consistently.
Begin with simple evaluations and add complexity as needed. A basic user-assistant exchange is easier to debug than a complex multi-turn flow.
Create separate evaluations for edge cases, error handling, and boundary conditions.
Next Steps
- Running Tests - Learn how to execute and monitor your evaluations
- Viewing Results - Understand evaluation results and debugging